Electric Stove Troubleshooting: Why Your Stove Isn't Working and How to Fix It
Urgent guide to diagnose and fix a stove not working electric, with practical checks, safe steps, and a clear diagnostic flow from Stove Recipe Hub.

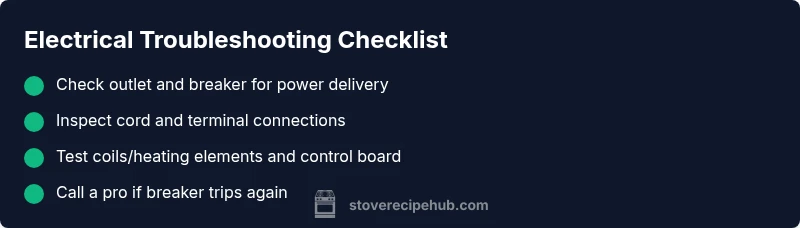
If your electric stove isn’t heating, the most likely causes are a tripped breaker, a blown fuse, or a faulty control or switch. Start by checking the circuit breaker, then test the outlet with another device, and inspect the stove’s power cord. If nothing restores heat, proceed with the diagnostic flow and consider safety-first maintenance or professional help.
Understanding the problem: stove not working electric
Experiencing a stove that won’t heat on an electric range is an urgent issue for home cooks. The phrase stove not working electric captures a common fault with several potential causes, from power delivery problems to failed heating elements. At Stove Recipe Hub, we guide you through safe, practical steps to identify the root cause and decide whether a DIY fix or a call to a professional is best. In many homes, the problem starts with power delivery or simple component faults rather than complex electronics. By recognizing the symptoms—such as lights on the control panel but no heat, or no indication at all—you can plan your next move quickly and safely.
Key signs to note include whether the display is active but the burner stays cold, if only certain burners fail, or if the oven section behaves differently from the cooktop. These nuances help narrow down causes like a tripped circuit, defective burner coil, bad relay, or a failing control board. Remember that diagnosing electrical faults involves safety considerations; if you smell burning, hear buzzing, or notice sparks, shut off power at the breaker and seek professional help. This initial awareness is your first step toward a prompt and safe repair.
Safety essentials before you begin
Safety comes first when dealing with an electrical appliance. Always unplug the stove or switch off the corresponding circuit breaker before touching any components. If your range is hard-wired, turn off the main service panel and test for residual voltage only with proper equipment. Keep water away from the unit to avoid shock hazards, and never inspect live wiring with wet hands. If you’re unsure about any step, err on the side of caution and contact a licensed electrician. Regular maintenance reduces risk: clean the cord connections, keep the area dry, and schedule periodic inspections of outlets and cords.
Quick checks you can do in minutes
In many cases, the simplest checks resolve the issue. Start with:
- Verify the outlet by plugging in a known-working appliance; if it doesn’t power up, the outlet or circuit is the issue.
- Inspect the breaker or fuse panel for a tripped breaker or blown fuse and reset or replace as needed.
- Examine the stove’s power cord and plug (if removable) for damage, burns, or loose connections.
- Look for any signs of wear on the terminal block or wire nuts where the cord connects to the stove.
- Confirm the control panel lights up and responds to input; unresponsive controls point to a control board or switch fault. If any of these steps reveal a problem, address it before testing heat again. If you’re unsure, or if the breaker trips repeatedly after a reset, stop and call a professional.
Common electrical faults explained
Understanding typical faults helps you decide what to replace or repair:
- Tripped breaker or blown fuse: A common, easily remedied safety feature. Restoring power after resetting the breaker or replacing the fuse often restores heat.
- Faulty heating element or coil: A burned-out coil or damaged element will prevent heating even with power. Replacing the element is usually straightforward but requires the correct part.
- Control board or infinite switch failure: The brain of the stove; if it fails, you may see no heat or erratic temperature control. This often requires a professional diagnosis and part replacement.
- Loose connections or damaged power cord: Poor connections cause intermittent heat or no heat. Tighten or replace connections and cords with the power off.
- Sensor or thermal cutoff trip: Some units have internal safeties that shut heat off if temperatures rise unexpectedly. Resetting or replacing faulty sensors may be needed.
Each fault has a different repair path and risk level. When unsure, prioritize safety and consult a licensed technician.
Diagnostic flow: symptom → diagnosis → fixes overview
This section provides a practical roadmap to narrow down the root cause. Start with simple power checks, then evaluate the cord and outlet, and finally delve into internal components for stubborn cases. The goal is to move from high-probability, low-effort checks to targeted fixes, documenting findings at each step. Remember, if you encounter signs of electrical fault beyond simple parts, professional intervention is the safest route. The diagnostic flow aligns with the Stove Recipe Hub approach: practical steps, safety-first thinking, and clear decisions about DIY vs. pro help.
Prevention and maintenance: keeping your stove reliable
Ongoing maintenance reduces the likelihood of future stove issues. Establish a routine that includes: inspecting cords and plugs for wear, keeping outlets dry and clean, testing breakers periodically, and scheduling annual inspections if your home has aging electrical systems. Clean burner coils gently to prevent corrosion and inspect heating elements for signs of damage. When replacing parts, use compatible components from reputable sources to ensure safe, reliable operation. A little proactive care goes a long way toward avoiding a repeat of the stove not working electric scenario.
Steps
Estimated time: 45-60 minutes
- 1
Power down and safety check
Turn off the stove and switch off the circuit breaker. Unplug the unit if possible and verify there is no power reaching the appliance. This prevents shocks while inspecting components.
Tip: Never work on live wiring; always cut power at the source. - 2
Test the outlet and breaker
Plug a known-good device into the same outlet to confirm power delivery. If the outlet is dead, reset the breaker and, if needed, replace a blown fuse.
Tip: If the breaker trips again after resetting, stop and call a professional. - 3
Inspect the cord and connections
Examine the stove’s power cord for cracks or exposed wires. Check the plug and the terminal block inside the back panel for looseness or scorch marks.
Tip: Only open the back panel if you are confident; take photos before disconnecting wires. - 4
Check individual burners
Remove the burner coils (if removable) and inspect for heat resistance or burns. Swap faulty coils with a spare from another burner to test heat output.
Tip: Keep track of which coil matches which burner for accurate reassembly. - 5
Test control components
If power is present but heat won’t respond to controls, test the infinite switch or control board connections. Look for burnt components or loose cables.
Tip: Control boards often require professional replacement due to internal circuitry. - 6
Make a decision about repair
If basic components test fine and no heat is produced, decide whether to replace the coil, cord, or seek professional evaluation for the control system.
Tip: Document your steps; this helps if you seek professional diagnosis.
Diagnosis: Electric stove won't heat or only some burners heat
Possible Causes
- highPower issue (outlet, cord, breaker)
- mediumFaulty heating element/burner coil
- lowControl board or switch failure
- lowLoose connections or damaged wiring
Fixes
- easyTest outlet with a known-good appliance and reset the circuit breaker
- easyInspect and replace damaged power cord or coil
- hardReplace or repair the control board or relay as needed
- mediumTighten connections or replace damaged wiring by a professional
Common Questions
What should I check first if my electric stove won't heat?
Begin with power delivery: outlet, cord, and breaker. If power is present but heat is absent, inspect individual burners and controls before considering internal components.
First check the outlet, cord, and breaker. If power is fine but you still have no heat, inspect burners and controls next.
Can a tripped breaker cause the stove to stop heating?
Yes. A tripped breaker cuts power to the stove. Reset the breaker and see if heat returns. If it trips again, there may be a short or overload requiring a professional check.
A tripped breaker stops heat. Reset and test, but don’t ignore repeated trips.
Is it safe to replace a heating element myself?
Replacing a heating element is feasible for some models, but it involves handling live electrical parts. If you’re unsure, consult a professional to avoid shock or fire risks.
Replacing a heating element can be doable, but it’s safer to have a pro handle it if you’re unsure.
When should I call a professional?
If basic checks don’t restore heat, if the breaker trips repeatedly, or you detect burning smells or damaged wiring, contact a licensed electrician promptly.
If basic fixes don’t help or you smell burning, call a pro.
Watch Video
Top Takeaways
- Start with power checks to rule out the simplest causes.
- Inspect cords, plugs, and outlets before replacing parts.
- Use the diagnostic flow to decide DIY vs. pro help.
- Prioritize safety; call a licensed electrician for complex issues.